 Save
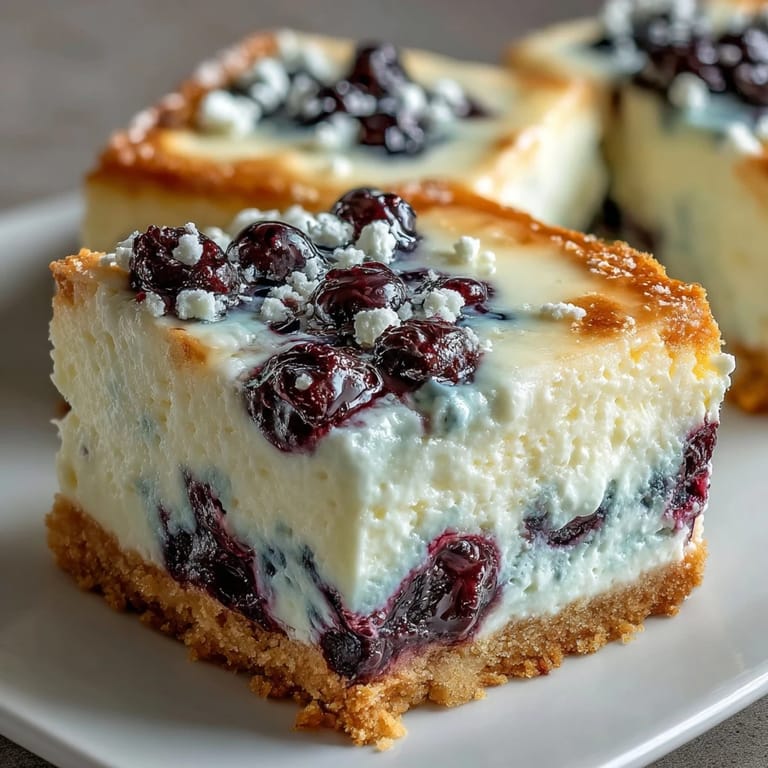
Save The scent of zesting lemons can pull me out of almost any slump, and I was instantly cheered the first time I made these bars on a rainy afternoon. The kitchen filled with lively citrus notes as I crushed biscuits, thinking how a no-bake dessert might brighten up such a gray day. I still remember the quiet fizz of blueberries simmering on the stove and the slightly guilty thrill of making something decadent without ever turning on the oven. That almost rebellious ease is part of what makes these cheesecake bars a repeat favorite. Sometimes simplicity really is the greatest luxury.
One summer I made these for a potluck, slicing them just as friends spilled in, tracking grass and laughter through the door. The sun hit the glossy swirls and everyone reached for a square before even taking off their shoes. Sometimes it's these unscripted moments—the last-minute garnishing, the sharing of first messy bites—that turn kitchen work into shared memory. I still get texts asking for "those lemon blueberry bars" every spring. Hosting feels so much easier when dessert is this make-ahead friendly.
Ingredients
- Graham crackers or digestive biscuits (200 g, crushed): The backbone of the crust; using freshly crushed biscuits avoids a dusty texture, and a food processor speeds things along.
- Unsalted butter (80 g, melted): Melted butter binds biscuit crumbs into a firm, buttery base—if your crust seems too dry, add a splash more.
- Granulated sugar (2 tbsp for crust, 2 tbsp for blueberry swirl): A bit of sugar in both the crust and the swirl rounds out tartness and boosts flavor.
- Cream cheese (400 g, softened): Letting it come to room temperature ensures the filling is lump-free and creamy.
- Powdered sugar (120 g): It dissolves smoothly into the cream cheese, keeping the cheesecake layer silky.
- Heavy cream (250 ml, cold): Whipped to stiff peaks, this transforms the filling into something cloud-like—go slowly when folding it in for maximum fluffiness.
- Lemon juice (2 tbsp) and lemon zest (1 tsp): Freshly squeezed and zested for bright, unmistakable citrus notes; a microplane makes zesting quick and fine.
- Pure vanilla extract (1 tsp): This deepens the flavor of the cheesecake layer—don’t skip it.
- Blueberries (200 g, fresh or frozen): Both work well, but frozen release more juice and may need slightly longer to cook down for the swirl.
- Cornstarch (1 tsp, mixed with 2 tsp water): This tiny bit brings the blueberry mixture together, providing lovely swoops and curls when swirled.
Tired of Takeout? 🥡
Get 10 meals you can make faster than delivery arrives. Seriously.
One email. No spam. Unsubscribe anytime.
Instructions
- Prep the pan:
- Line your baking pan with parchment, letting it hang generously over the sides. That overhang will become your secret assist when lifting perfect bars later.
- Make the crust:
- Mix biscuit crumbs, melted butter, and sugar in a bowl until everything looks sandy and damp. Dump it into the pan and press down firmly—an extra minute making sure the base is tightly packed pays off in every slice.
- Chill the base:
- Pop the crust in the fridge while everything else comes together. This helps it firm up and hold its shape.
- Cook the blueberry swirl:
- In a small saucepan, combine blueberries, sugar, and lemon juice, then warm gently until the berries burst and the juices bubble. Stir in the cornstarch slurry and watch it transform into a glossy, jewel-toned sauce; let it cool before swirling.
- Blend the cheesecake filling:
- Beat softened cream cheese with powdered sugar until sleek and dreamy, then beat in lemon juice, lemon zest, and vanilla. In another bowl, whip cold cream to stiff peaks and gently fold that fluff into the cream cheese mixture for a mousse-like filling.
- Spread and swirl:
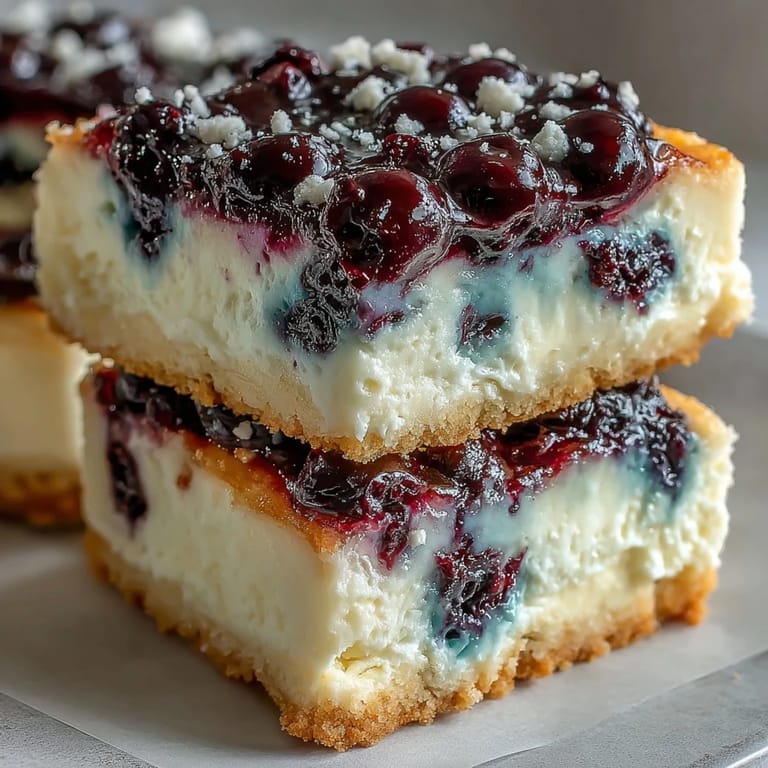
- Smooth the cheesecake mixture over the chilled crust, and dot the blueberry sauce across the top. Drag a knife or skewer through the dollops in lazy figure-eights to create swirls—don't overdo, or it will muddy.
- Chill until set:
- Cover and refrigerate at least four hours, or overnight for easier cutting. Patience is key, but it's worth it for clean bars.
- Slice and serve:
- Lift the bars using your parchment handles, slice them into neat squares, and serve cold with an extra scatter of berries if you like.
 Save
Save After a long day juggling work and errands, I found myself quietly eating a corner piece straight from the fridge, fork in one hand and tomorrow's to-do list untouched. That bite—a little tang, a sweet chill, crumbs that don't quite stick—reminded me how sometimes dessert can soften even the busiest weeks into something worth savoring slowly.
Make-Ahead Convenience
The true beauty of these bars is their flexibility. I often make them a day ahead when expecting company, and they’re actually easier to slice after a full night in the fridge. If you're prepping for a gathering, just keep the pan covered and they'll stay perfectly fresh and happy.
Swirling Secrets
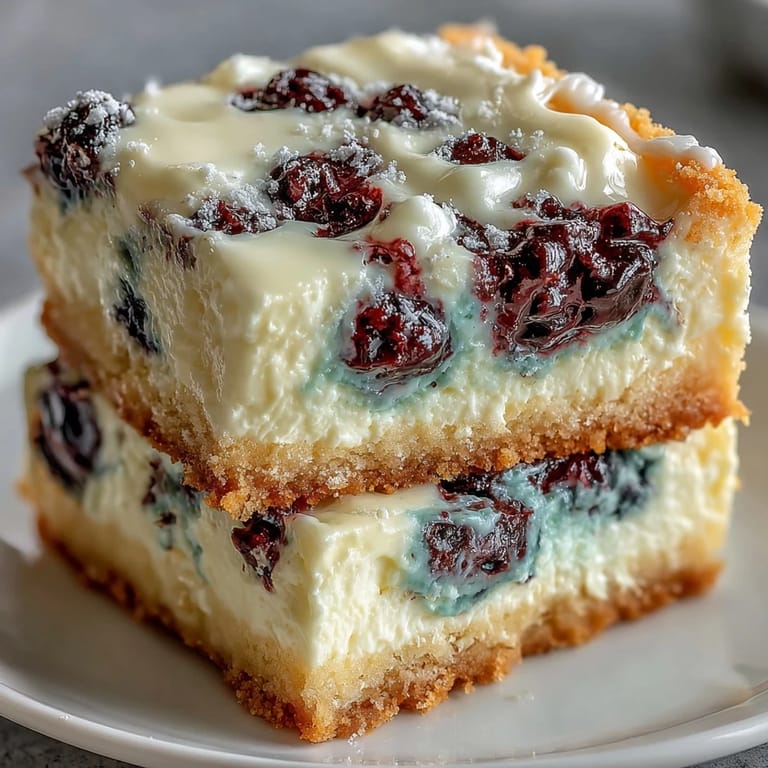
I learned (after some Jackson Pollock-worthy mishaps) that using a chopstick or thin skewer instead of a knife makes for prettier, finer swirls. If you want to practice, try swirling a bit in the bowl first so you get a sense of how much is just enough. Remember, less is more—the colors will stand out if you resist over-mixing.
Serving and Storage Tips
These bars are best enjoyed cold, eaten with fingers or a fork depending on the occasion and mood. If leftovers linger, keep them tightly covered in the fridge for up to three days; the crust stays firm and flavors even deepen. For fuss-free parties, slice before your guests arrive and dress up the top with extra blueberries or a twist of lemon peel for drama.
- Chill your knife for easier, cleaner slicing.
- Don’t skip the parchment overhang—future you will thank past you.
- If lemon is your star flavor, add an extra pinch of zest just before serving.
 Save
Save May these bars add a burst of sunshine to your table whenever you crave something indulgent yet effortless. Here's to lemony layers, messy fingers, and making a little magic—no oven required.