Save
Save There's something magical about turning simple chocolate bars into tiny edible trees, especially when the kitchen fills with that warm cocoa smell and tiny hands are reaching for sprinkles. I stumbled onto this idea a few years back when my niece asked if we could make something festive together that didn't require an oven or complicated baking skills. Within twenty minutes, we had these whimsical little trees lined up on the counter, each one unique and proud-looking, drizzled with chocolate that caught the light like fresh snow. It became our thing—the one dessert that made everyone smile because it felt more like play than cooking.
I'll never forget the Christmas Eve when my neighbor brought over a tin of these, and my kids lined them up on the window sill like tiny edible decorations. Everyone kept picking them up "just to look" and then accidentally eating them, and somehow that felt exactly right—the best kind of recipe is one people can't stop reaching for.
Ingredients
- 24 mini Kinder chocolate bars: These are perfect because they're already the right size and have that satisfying crunch, but honestly any small quality chocolate bar works just as well.
- 150 g dark or milk chocolate, chopped: This is your glue and your magic—the part that holds everything together and makes it look intentional.
- 1 tsp coconut oil (optional): A tiny trick I learned that makes the chocolate flow like silk instead of clumping up when it cools.
- 3 tbsp festive sprinkles or edible glitter: This is where you let the moment shine—whatever colors make you happy work here.
- 8 mini chocolate stars or candy stars: The crowning touch that makes them unmistakably trees, though honestly any small candy works as a topper.
Tired of Takeout? 🥡
Get 10 meals you can make faster than delivery arrives. Seriously.
One email. No spam. Unsubscribe anytime.
Instructions
- Prepare your workspace:
- Line a tray with parchment paper and clear some counter space so you can spread out. This setup takes thirty seconds and changes everything about how smoothly the whole process feels.
- Unwrap and stack:
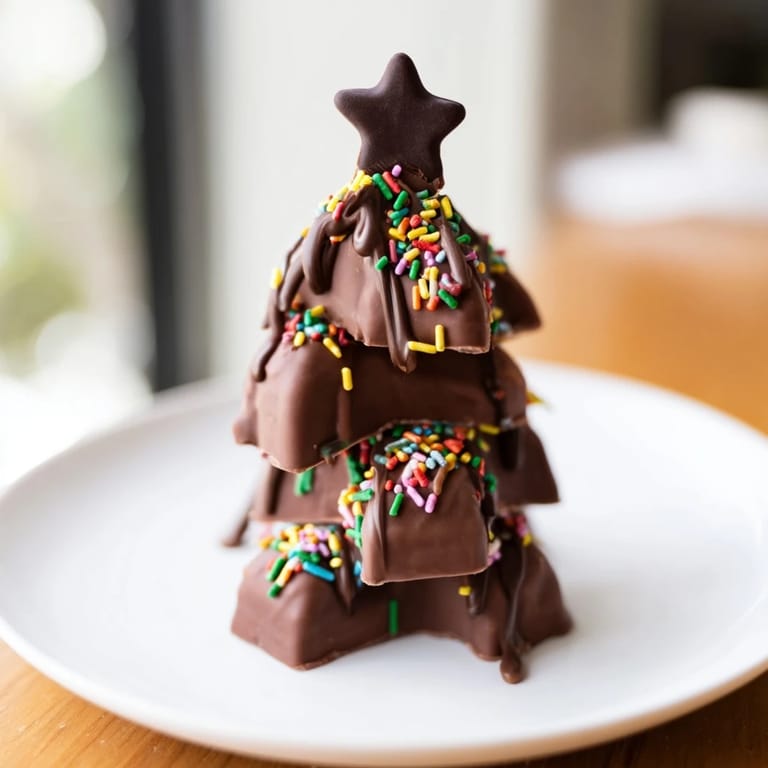
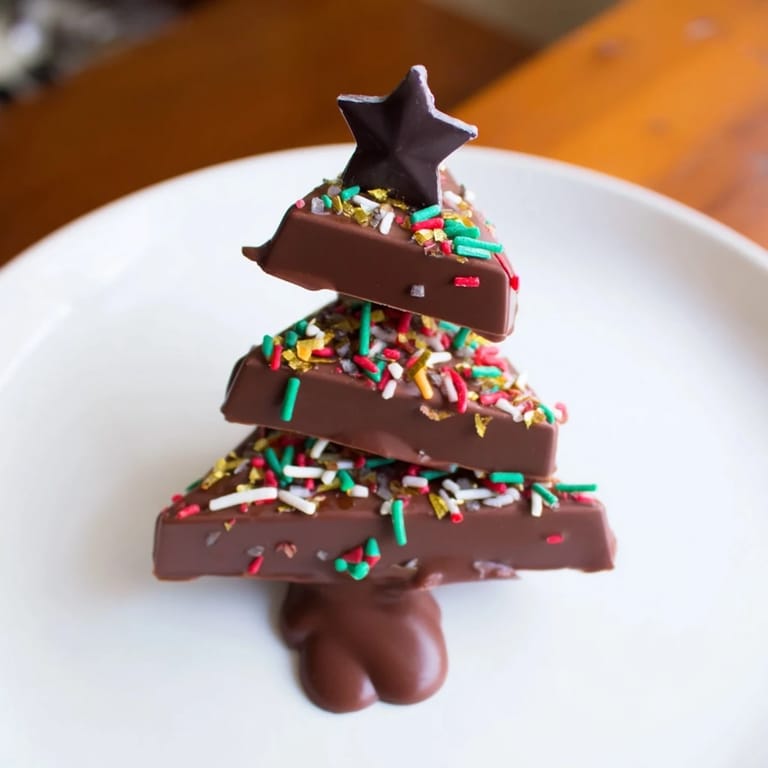
- Unwrap all your bars first—let the kids do this part if they're around, it's oddly satisfying. Stack three bars per tree: one whole as your base, one broken in half and overlapped to create a triangle shape in the middle, then another full bar or half on top for height, or arrange however feels right to you.
- Arrange on the tray:
- Space each tree stack a couple inches apart so the drizzle doesn't connect them into one chocolatey blob. Step back and look at them—they already look festive.
- Melt the chocolate:
- Choose your method: microwave in twenty-second bursts stirring between each, or the old-fashioned heatproof bowl over simmering water. The bowl method is slower but harder to mess up. Stir in the coconut oil and watch it transform into something glossy and pourable.
- Drizzle with intention:
- Use a spoon or piping bag to generously drizzle the warm chocolate over each tree stack in loose branches—it doesn't need to be perfect, the imperfect drips actually look more real. You'll know you got it right when it looks like trees got dressed up for the occasion.
- Decorate immediately:
- Before the chocolate sets, scatter your sprinkles over the wet drizzle and place a star on top of each tree. This is the moment where they transform from chocolate stacks into something magical.
- Chill and set:
- Refrigerate for ten to fifteen minutes until the chocolate is fully firm to the touch. This is when the flavors meld and everything sets into its final form.
 Save
Save These trees have a way of becoming the dessert people ask for every holiday season. There's something about biting into that cold chocolate bar nested inside warm drizzled chocolate that feels unexpectedly comforting, like a little gift wrapped in cocoa.
Choosing Your Chocolate Wisely
The chocolate you choose for drizzling is more important than you'd think. Dark chocolate gives you elegance and a slightly sophisticated bitter note, while milk chocolate leans into pure festive joy. I've even done white chocolate when I wanted something that photographs beautifully under the lights. The bar choice matters too—Kinder bars are special because they have that hazelnut layer that surprises people, but I've made these with fancy petit fours chocolate bars and gourmet selections when I wanted to feel fancy.
Making This a Group Activity
One of the unexpected joys of this recipe is how naturally it becomes a shared project. Kids can handle the unwrapping and stacking without any real skill, and decorating becomes this peaceful, focused activity where everyone creates their own tiny edible sculpture. I've hosted Christmas crafting parties where people stand around talking and laughing while assembling trees, and somehow that feels more memorable than eating them. You could even set up a decorating station and let guests customize their own—the variety is part of the charm.
Storage and Make-Ahead Magic
These keep beautifully in an airtight container for up to a week, which means you can actually make them days ahead and feel genuinely prepared for once. Room temperature is fine, though I prefer them slightly chilled so the chocolate stays crisp. The real discovery I made was that you can assemble the stacks hours ahead, then drizzle and decorate right before serving if you want everything fresh and still slightly warm.
- Keep them in a cool, dry spot away from direct sunlight or they'll sweat and get sticky.
- If you're making them several days ahead, add a thin layer of parchment between layers so they don't stick together.
- Chilled versions hold their shape better if you're stacking them for display or transport.
 Save
Save These little trees somehow manage to be both impressively festive and genuinely easy, which is exactly the recipe formula that makes you want to make them again and again. They taste like chocolate and joy and the small satisfaction of creating something beautiful with your own hands.
Recipe Questions & Answers
- → How do I shape the chocolate bars to resemble trees?
Stack three mini bars by placing one whole bar at the bottom, then half bars overlapped to form a triangle, and top with another bar for height, creating a tree silhouette.
- → What chocolate works best for the drizzle?
Either dark or milk chocolate can be used. Adding a teaspoon of coconut oil helps achieve a smooth, glossy melt for drizzling.
- → Can children help with making these treats?
Absolutely! Kids can easily assist with stacking the bars, drizzling chocolate, and adding decorative sprinkles and stars.
- → How should I store the finished chocolate trees?
Keep them in an airtight container in a cool place or the refrigerator for up to one week to maintain freshness and shape.
- → Are there any common allergens to be aware of?
These treats contain milk and soy and might contain traces of nuts and gluten depending on the chocolate bars used. Always check packaging labels.