 Save
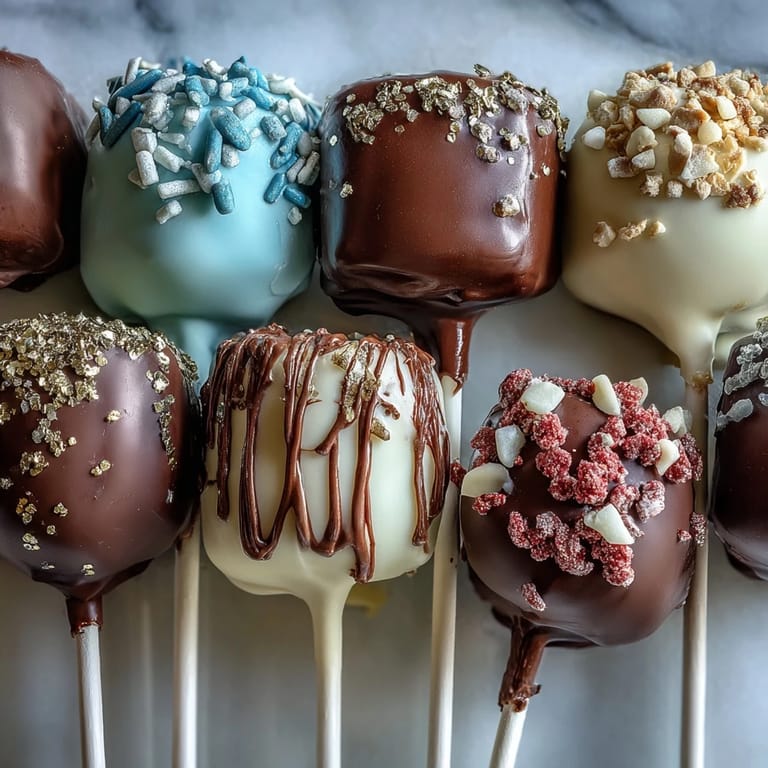
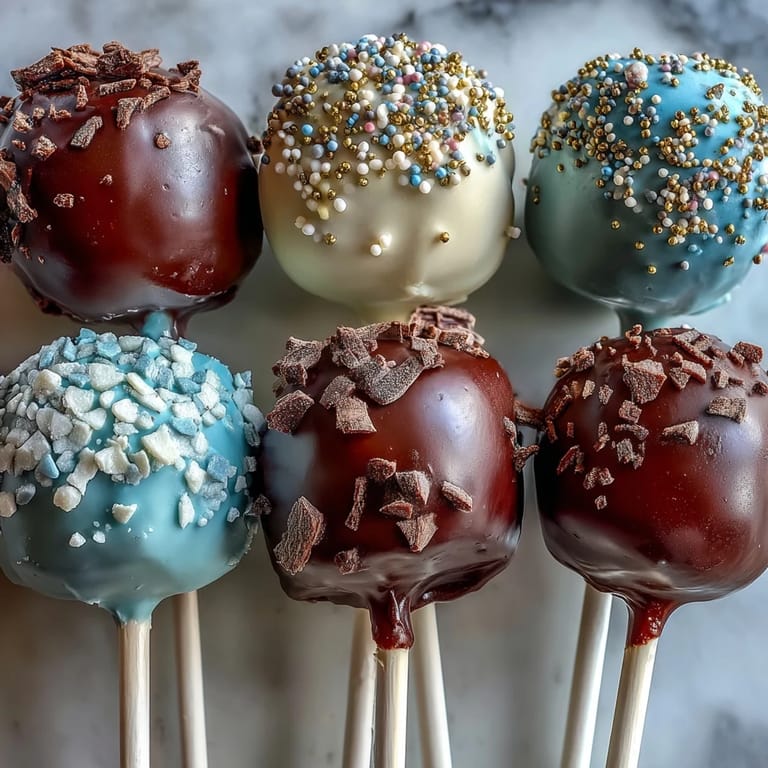
Save My cousin texted me three weeks before her graduation asking if I could make something special for her party, and I immediately pictured these cake pops in her school colors—deep blue and gold. There's something magical about turning a simple cake into bite-sized celebrations, each one catching the light with those golden sprinkles. I'd never made them before, but watching her face light up when she saw the table covered in these little gems made me realize I'd found a new favorite way to mark milestones. It's not fancy or complicated, just joyful and personal.
I remember standing in my aunt's kitchen at 11 p.m. the night before the party, realizing I'd underestimated how long it takes to dip 24 cake pops one by one. My hands were covered in candy melt, my hair had somehow gotten a sprinkle of gold in it, and I was laughing harder than I should have been. By the end, my cousin came in, grabbed a wooden spoon, and started helping me dip—we finished the last batch together while eating the imperfect ones straight from the Styrofoam block. Those messy last-minute moments turned into the best part of the whole process.
Ingredients
- 1 box (about 400 g) vanilla or chocolate cake mix: Choose whatever flavor makes you happy—vanilla is neutral and lets the decorative colors shine, but chocolate adds richness if you want something slightly more indulgent.
- 1/2 cup (115 g) unsalted butter, softened: Softened butter is non-negotiable here; cold butter will make your frosting grainy and impossible to mix smoothly.
- 1 1/2 cups (190 g) powdered sugar: Sift this if it's lumpy, or you'll end up with grainy frosting that looks unpolished.
- 1 tablespoon milk: This adjusts the consistency—add it slowly so your frosting doesn't become too thin.
- 1 teaspoon vanilla extract: A small touch that keeps the frosting tasting fresh instead of overly sweet.
- Pinch of salt: Trust this tiny addition to balance all that sweetness.
- 450 g (16 oz) candy melts in two school colors: Buy a bit extra because there's always some waste when dipping, and specialty colors can sell out quickly.
- 2 tablespoons vegetable shortening or coconut oil: This is optional but genuinely game-changing—it thins the candy melts just enough so they coat smoothly instead of clumping up.
- Gold sprinkles or edible gold glitter: Apply these while the candy coating is still tacky, or they'll slide right off.
- 24 lollipop sticks: These are easier to find than you'd expect at craft stores or online.
- Styrofoam block: A piece of florist's foam works perfectly for holding the pops upright while they dry.
Tired of Takeout? 🥡
Get 10 meals you can make faster than delivery arrives. Seriously.
One email. No spam. Unsubscribe anytime.
Instructions
- Bake and cool the cake:
- Follow the box instructions exactly—don't skip the cooling step or your frosting will melt into soup when it touches the warm cake. Once it's completely cool, you can crumble it with your hands, which is oddly satisfying.
- Make frosting that holds its shape:
- Beat the softened butter for about a minute until it's pale and creamy, then add powdered sugar slowly—use your hands to break up lumps if needed. Add the milk and vanilla last, beating until you reach stiff peaks that hold their shape.
- Mix cake and frosting into dough:
- Crumble your cake into a large bowl—it should look like wet sand at first. Add frosting gradually, mixing with your hands or a wooden spoon until the mixture holds together when you squeeze it but isn't gluey or overly wet. You might not need all the frosting.
- Roll perfectly sized balls:
- Use a tablespoon or small cookie scoop to keep them even, rolling between your palms until smooth. Uneven balls dip unevenly, so take a breath and make them as consistent as you can.
- Chill so sticks stay put:
- Refrigerate for at least an hour or freeze for 30 minutes—cold cake balls won't crumble when you insert sticks. This step feels optional but it absolutely isn't.
- Anchor the sticks securely:
- Dip the stick tip in melted candy melt, then push it halfway into each ball at a slight angle. This glue-like coating is what keeps sticks from spinning loose later.
- Dip into your school colors:
- Melt each color in separate bowls and stir in shortening if using—the mixture should be smooth but not thin. Dip each pop slowly, letting excess drip off, then gently twist before lifting out.
- Add gold while still wet:
- Sprinkle the gold over each pop immediately after dipping, before the coating sets—this is the only moment it will stick properly. If you wait, the sprinkles will just bounce off onto your counter.
- Let them harden completely:
- Stand them upright in your Styrofoam block and give them at least 30 minutes—the longer the better. This is a good time to clean up your candy-melt-covered workspace.
 Save
Save When my cousin saw the finished pops arranged in their colors, she actually gasped—there's something about homemade decorated treats that feels more meaningful than store-bought ones, especially when they celebrate something someone worked years to achieve. She packed one into her cap when she walked across the stage, which I think says everything about how these little things can carry emotion.
Timing Your Preparation
Plan to spend about 2 hours total, but spread it across two days if possible—bake the cake the night before, then do the rolling, chilling, and dipping the next day. The chilling step is when you get a break, so use that time to melt your candy colors and set up your workspace. If you're making these the morning of an event, give yourself extra buffer time because rushing these pops shows in the finished product.
Color Combinations That Work
School colors work best, but if you want ideas, think about which shades look good next to each other—navy and gold is stunning, as is burgundy and silver or forest green and white. You can also do two-tone pops by half-dipping in one color, letting it set slightly, then dipping the other half in a second color for a dramatic split effect. The gold always works as a unifying accent, tying multiple colors together visually.
Storage and Serving Ideas
These keep surprisingly well in an airtight container at room temperature for up to 3 days, which makes them perfect for preparing ahead of celebrations. If it's warm where you are, refrigerate them to keep the candy coating from softening, but take them out 10 minutes before serving so they're pleasant to bite into. You can also tie small ribbons in school colors around the sticks or even personalize the Styrofoam display with a banner for a photo moment at the party.
- Stack them in layers separated by parchment paper in an airtight container so they don't stick together.
- If the coating cracks after refrigeration, it's just condensation—they'll still taste perfect and the cracks won't show under the gold.
- Make extra pops for unexpected guests or to sneak one or two for yourself, because they disappear fast.
 Save
Save These cake pops turned a regular graduation party into something memorable, and now I make them for every celebration that needs a special touch. They're proof that homemade doesn't have to mean complicated—sometimes it just means caring enough to take the time.
Recipe Questions & Answers
- → How do I ensure the cake balls hold together?
Mix the cake crumbs with enough frosting (about 1/2 to 3/4 cup) until the mixture is firm but not too wet, allowing easy shaping and a sturdy texture.
- → What is the purpose of dipping the lollipop sticks in melted candy first?
Dipping sticks in melted candy secures them inside each cake ball, preventing loosening while coating and serving.
- → Can I use different cake flavors?
Yes, vanilla or chocolate cake mixes work well. Feel free to customize flavors to your preference for varied taste.
- → How should I store the finished pops?
Keep them in an airtight container at room temperature for up to 3 days or refrigerate for up to one week to maintain freshness.
- → What helps achieve a smooth coating finish?
Adding vegetable shortening or coconut oil to melted candy melts smooths the coating and reduces thickness for easy dipping.