 Save
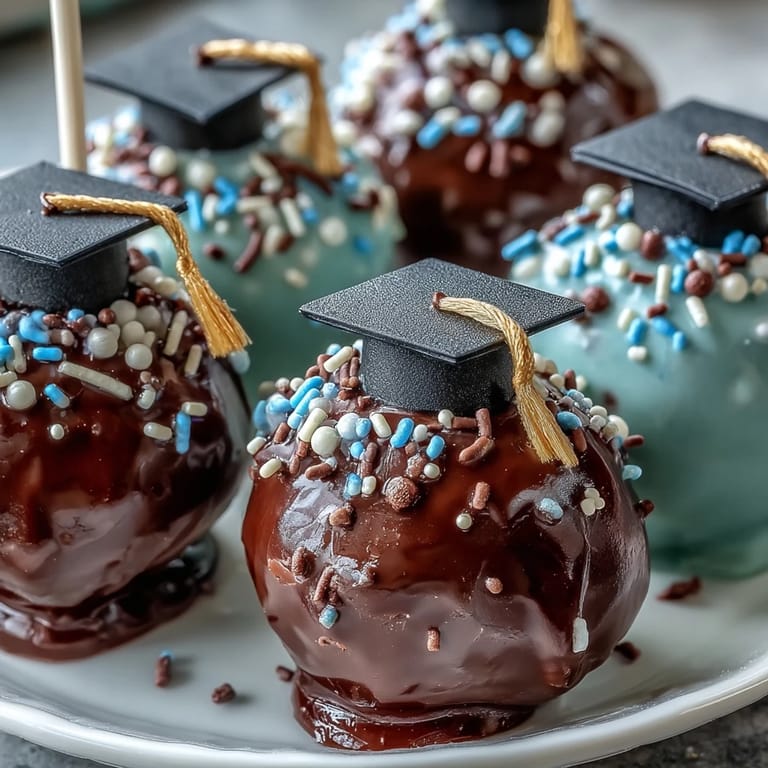
Save The first time cake pops entered my kitchen, they weren't exactly picture-perfect & I found myself laughing at crooked sticks and lopsided spheres. But there was something joyful about the colors and the sweet aroma that filled the kitchen, especially when I realized they could be customized for nearly any occasion. Fast forward to graduation season & these cake pops in school colors became my secret weapon for quick, show-stopping celebration treats. There's nothing quite like the moment when chocolate melts, sprinkles, and fondant turn into edible mini diplomas & everyone marvels at the result. It's almost like crafting & baking all rolled into one busy, delicious afternoon.
I remember making these for my cousin's graduation party where the kitchen was a whirlwind of laughter, colored sprinkles flying, and someone inevitably licking melted chocolate off a spoon. The most challenging part was letting the pops set before eager hands tried to snatch them up. That evening, as bright cake pops in neatly lined rows became the center of attention, I realized just how simple touches could make everyone feel celebrated. It was also the moment I learned fondant squares could become graduation caps almost by accident. Every pop felt like a tiny edible reward for finishing school.
Ingredients
- Cake mix or homemade cake: A moist base is key, and cooling completely prevents mushy pops & I once rushed this step and regretted it.
- Cream cheese or buttercream frosting: Start slow & add just enough for the crumbs to stick, otherwise pops become too soft & don't hold their shape.
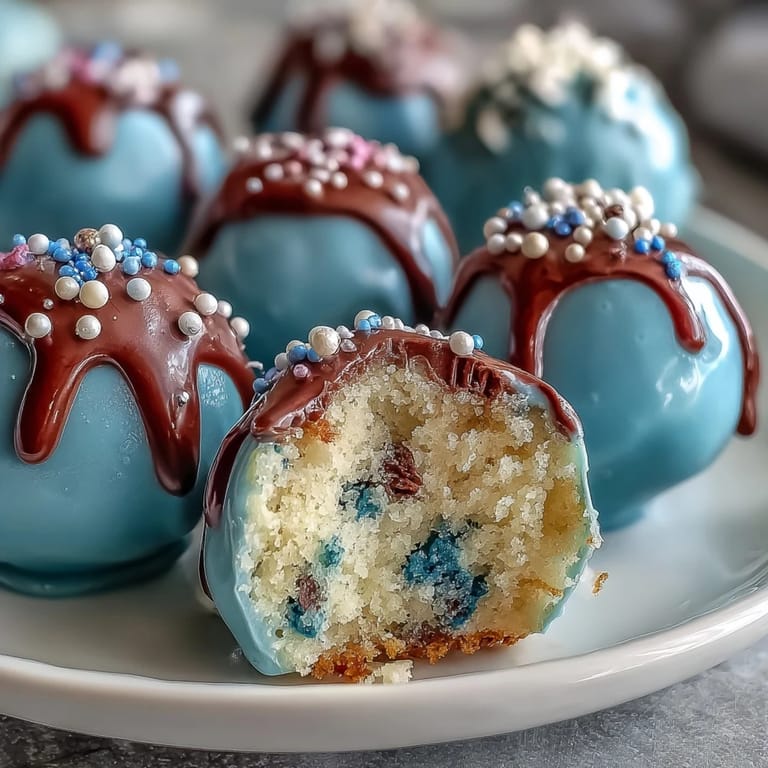
- Candy melts in school colors: The vibrancy is irresistible & thinning with a touch of shortening helps coat evenly without clumping.
- Sprinkles and edible glitter: Coordinated colors are an instant upgrade for party trays & kids love helping with this job.
- Lollipop sticks: They turn messy bites into party-ready treats & are essential for making the pops stand tall.
- Mini chocolate chips: These little guys make the cutest tassels on your cap pops & double as chef snacks when decorating.
- Fondant (optional): The quickest way to add graduation flair, and it's surprisingly forgiving when cut with a small knife.
Tired of Takeout? 🥡
Get 10 meals you can make faster than delivery arrives. Seriously.
One email. No spam. Unsubscribe anytime.
Instructions
- Bake and cool:
- The scent of warm cake fills the kitchen & patience is rewarded—wait until fully cool before moving on.
- Crumble base:
- Use your fingers to break up the cake into fine crumbs—it's oddly satisfying and guarantees no lumps.
- Add frosting:
- Mix gently & squeeze the dough together, stopping when you can form a ball that holds without crumbling.
- Shape pops:
- Scoop, roll, and smooth each ball, aiming for uniform size—otherwise they'll tip over later.
- Chill and prep:
- Refrigerate or freeze until firm to touch—this helps the coating stick instead of slide.
- Melt and thin coating:
- Microwave candy melts or chocolate, stirring frequently; add shortening little by little until silky.
- Insert sticks:
- Dip each stick tip in melted coating, then gently push halfway into each ball—this locks them in place.
- Dip cake pops:
- Submerge each pop, turning and tapping off extra—and let the colors shine as you work quickly.
- Decorate:
- Add sprinkles or sugar while coating is wet; for caps, top with fondant squares & a chocolate chip tassel.
- Set pops:
- Arrange pops upright in styrofoam or a stand and let them dry until the coating is firm and glossy.
 Save
Save After several batches at a graduation open house, I realized these cake pops became more than dessert—they invited conversation and jokes, and suddenly the kitchen felt like a gathering place. Everyone wanted a hand in the decorating, even those who normally avoided baking. These little pops transformed the whole mood & no one minded sticky fingers or uneven sprinkles. It's funny how celebration food makes even small mistakes part of the fun. That day, the cake pops felt like tiny declarations of joy.
Decorating Ideas That Always Get Compliments
Try mixing edible glitter with sprinkles for eye-catching sparkle & coordinate tassels in two-tone colors for extra detail. Sometimes I use edible markers to add a quick graduation year or initials, which instantly personalizes each pop. If you& feeling creative, shape a little fondant diploma or just swirl on a bold dash of colored sugar. Let your countertop become a mini art studio—kids and grown-ups alike can& resist pitching in. It& as much about the process as the finished result.
How to Prevent Cake Pops from Cracking
Don& dip cake pops when they& still cold from the fridge, because sudden temperature changes can split the coating. Let them sit for a few minutes, then dip with confidence & move quickly to decorate. If you spot tiny cracks, stick a sprinkle or fondant shape over the flaw and nobody will notice. The right thickness of chocolate makes all the difference—too thin and it& drippy, too thick and it can set unevenly. Always test with one pop before doing the whole batch.
Party Prep & Storage Tips
If you want cake pops to impress, prep them the night before & let the coating set undisturbed for several hours. I& learned that using a deep styrofoam block keeps them upright and prevents dents. Keeping them in an airtight container preserves texture, and chilling them is perfect for summer events—plus, it makes them extra refreshing under hot lights.
- Let pops come to room temperature before serving so colors look their best.
- A sprinkle of colored sugar can revive cake pops that look dull after storage.
- Label containers if storing multiple batches in school colors to avoid mix-ups.
 Save
Save Every batch is a chance to celebrate, share, and surprise someone, and these cake pops always deliver a bit of joy. Here& to making graduation feel extra sweet and memorable with a homemade touch.
Recipe Questions & Answers
- → How can I match cake pop colors to my school?
Use candy melts or white chocolate tinted with food coloring to create hues that correspond to your school's colors. Decorate with colored sprinkles and fondant as needed.
- → Can I make the cake pops ahead of time?
Yes, you can prepare pops up to a week in advance and store them in the refrigerator. For best texture, keep them in an airtight container.
- → What type of frosting works best for binding cake pops?
Cream cheese or buttercream frosting help bind the cake crumbs. Add gradually until the mixture holds together without becoming too sticky.
- → How do I achieve a smooth chocolate coating?
Melt candy melts or chocolate in short increments and stir until smooth. If the coating is thick, add a little vegetable shortening to thin it before dipping.
- → Are these suitable for gluten-free diets?
To adapt for gluten-free needs, use a gluten-free cake mix and verify that all decorations and candy melts are gluten-free.
- → What tools are essential for creating cake pops?
Gather mixing bowls, a baking sheet, microwave-safe bowl, lollipop sticks, styrofoam block or stand, and a spatula for successful preparation.